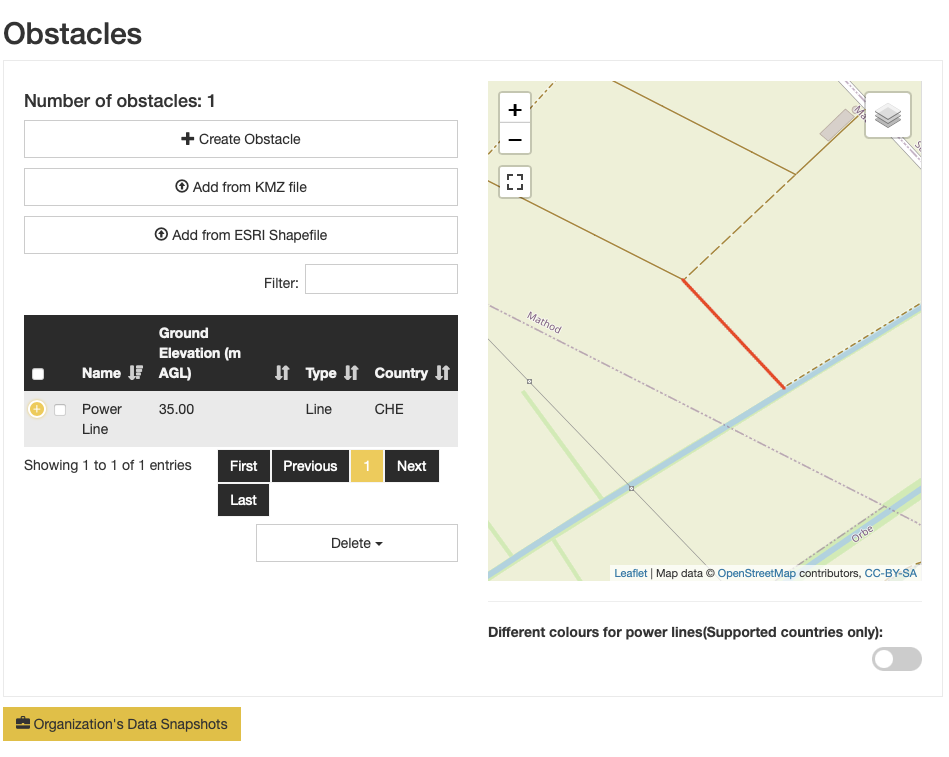
Obstacles#
Import obstacles or create them manually on the map to share with your members. An obstacle can be either a line, an area or a point. For punctual obstacles, the type may be used to render the obstacle using a dedicated icon.
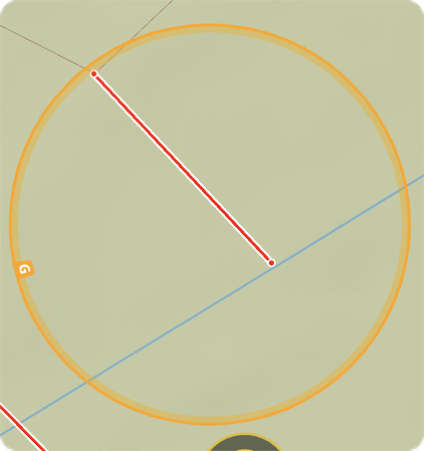
Obstacle (red line) loaded in Air Navigation Pro#
Access#
Actions#
Creating and Editing#
You may create an obstacle by clicking on the  button. This opens a dedicated map based view:
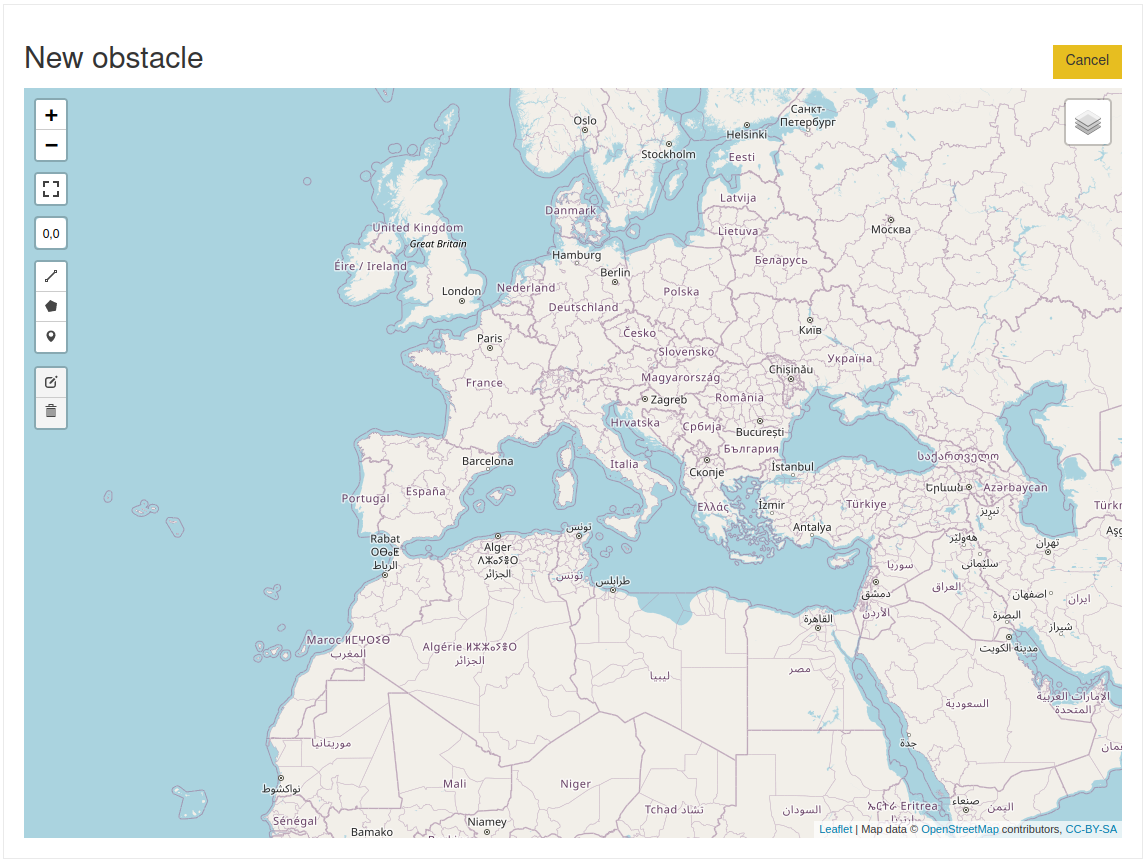
To create obstacles, you may use the tools on the left of the map, detailed below:
 : make the make full screen
 : Enter your obstacles by coordinates, see details below
 : Draw a line obstacle, e.g. a power line
 : Draw a polygon, e.g. a building or a exclusion zone
 : Set a point obstacle
 : Once an item has been defined, you may change the coordinates with this tool
 : You may remove an item with this feature
Entering by coordinates#
When you select the button, the following form opens below the map:

You may select the type of object you wish to import, line or point. Then enter your coordinates. If the type is a line, every new point extends the line. If the type is point, you may enter only one coordinate.
The reference system is not necessarily longitude/latitude, other coordinate systems are supported. See https://airnavigation.aero/manual/en/html/manual/moving-map.html#search-by-coordinates for the supported projection systems.
Defining obstacle properties#
Once the geometry is defined, a popup form is presented where you can add additional properties.
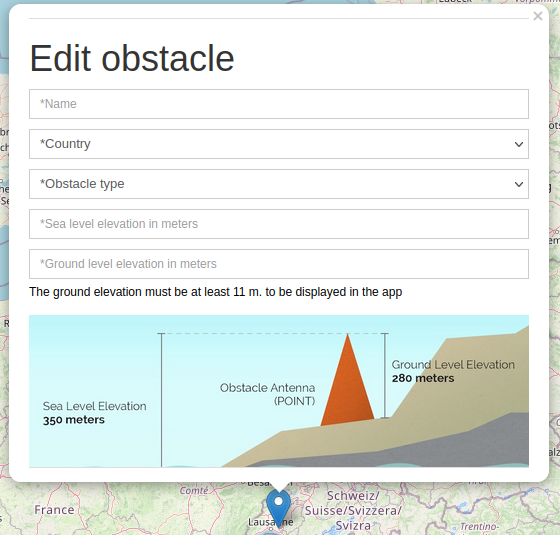
Several parameters are mandatory, indicated with *.
You have the possibility to set here the associated data group.
To save the obstacle, scroll to reach the bottom of the popup and click on  .
.
In case you have closed the popup inadvertently, you may reopen it by clicking on the geometry.
You may cancel the creation of the obstacle by clicking on  in the top right.
Editing an existing obstacle#
Editing an existing obstacle uses the same editor as for the creation. To edit an obstacle, find the  button in
the obstacles’ overview.
button in
the obstacles’ overview.
Removing obstacles#
There are several way to remove obstacles: individually, using the  button, or in bulk after selection.
Importing obstacles#
There are 2 options to import obstacle data: KMZ or ESRI Shapefile.
Note
Obstacles imported from external sources are added to the default data group.
KMZ#
The import by KMZ requires the input file to be created using the following rules:
Make sure the points’ altitudes are relativeToGround. By default, they are are above mean sea level. Converting them to AGL requires extracting the ground level altitude for every point, which is extremely slow.
Supported obstacles’ geometries are Point, LineString and Polygon.
Make sure the altitudes are expressed in meters.
The obstacle types are set to other by default.
You may produce a KML file following the specifications at https://developers.google.com/kml/documentation/, but convert it to KMZ before importing it. A KMZ file is a ZIP file containing only the KML file.
If you want to have different obstacle types, you must use the Extended data fields as described at https://developers.google.com/kml/documentation/extendeddata to set a number of fields.
In particular, please make sure the following field is set for every obstacle: obstacle_type where the type is string. For every obstacle, the possible value is among:
power support
mast
building
chimney
tower
factory
antenna
wind turbine
cable
spire
other
crane
pole
tank
barrier
mill
mountain
natural
vegetation
line
tree
church
forest
anemometer
silo
hill
radar
terrain
aerial railway
lift
water pipe
Sign
aerial
In case the chosen type is not in that list, the type other is used.
For convenience, the following obstacles may be input as LineString and will be rendered as lines in the app:
power support
cable
aerial railway
line
forest
lift
water pipe
vegetation
terrain
natural
Line obstacles may not cross the antimeridian.
You may define additional fields:
remarks of type string
max_height_agl of type float: the maximum height of the obstacle above ground level. It should be specified if the altitude per point is defined as above mean sea level. If not defined, we use the max of the individual point altitudes.
top_elevation_amsl of type float: the maximum of the elevation of the obstacle above mean sea level. If not defined, max_height_agl is used.
country of type string: the 3 letter country code. Not mandatory.
Example file#
Below is an example of a complete and valid KML file:
<?xml version="1.0" encoding="UTF-8" ?>
<kml xmlns="http://www.opengis.net/kml/2.2"
        xmlns:kml="http://www.opengis.net/kml/2.2"
        xmlns:atom="http://www.w3.org/2005/Atom"
        xmlns:xsi="http://www.w3.org/2001/XMLSchema-instance">
<Document>
    <name>Some obstacles</name>
    <Schema name="schemaname" id="schemaname">
        <SimpleField type="string" name="obstacle_type">
           <displayName><![CDATA[obstacle_type]]></displayName>
        </SimpleField>
        <SimpleField type="float" name="max_height_agl">
           <displayName><![CDATA[max_height_agl]]></displayName>
        </SimpleField>
        <SimpleField type="float" name="top_elevation_amsl">
           <displayName><![CDATA[top_elevation_amsl]]></displayName>
        </SimpleField>
        <SimpleField type="string" name="country">
           <displayName><![CDATA[country]]></displayName>
        </SimpleField>
        <SimpleField type="string" name="remarks">
           <displayName><![CDATA[remarks]]></displayName>
        </SimpleField>
    </Schema>
    <Placemark>
        <name>Some obstacle name</name>
        <ExtendedData>
           <SchemaData schemaUrl="#schemaname">
              <SimpleData name="obstacle_type">mast</SimpleData>
              <SimpleData name="max_height_agl">20</SimpleData>
              <SimpleData name="top_elevation_amsl">120</SimpleData>
              <SimpleData name="remarks">Some useful remarks</SimpleData>
              <SimpleData name="country">CHE</SimpleData>
           </SchemaData>
        </ExtendedData>
        <Point>
                <altitudeMode>relativeToGround</altitudeMode>
                <coordinates>
                        8.422020833333333,47.68302055555556,20
                </coordinates>
        </Point>
    </Placemark>
    </Document>
</kml>
ESRI Shapefile#
The import with shapefile requires to produce files compliant with the format described here.
Your shapefile must be either a Zip file containing the shapefile (usually obtained from an external source) or the individual shapefile files with extensions:
shp
shx
dbf
In addition you may have a file with extension prj containing the projection used. If the file is not provided, the projection will be assumed to be EPSG:4326, also known as WGS86 (longitude/latitude).
Note
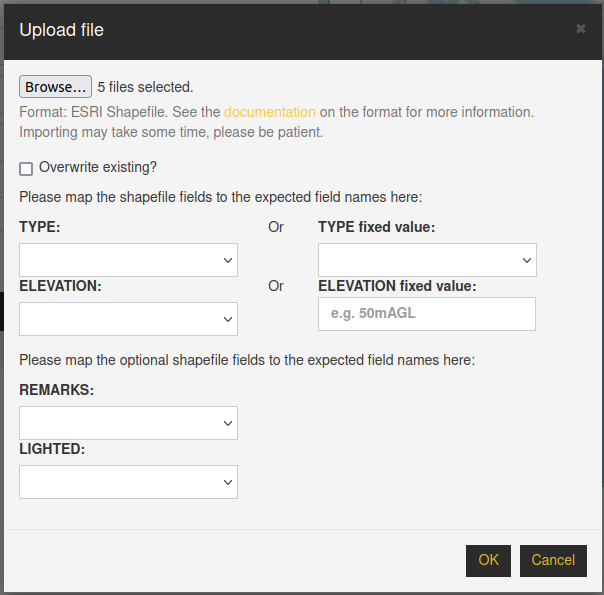
During the import, if some columns in your source are missing with respect to the expected ones, you will have the possibility to select a mapping between the columns in you data and our expected columns, or to set fixed values to use for all the geometries.
Supported geometries#
Point and LineString are supported types, but not all obstacle types can be a LineString. Please refer to the table below to know which ones can be lines.
Line obstacles may not cross the antimeridian.
Fields#
The following fields are mandatory:
- NAME
The obstacle name. 100 characters
- TYPE
Among the list below.
- COUNTRY
3 letter ISO code. E.g. CHE for Switzerland, FRA for France, DEU for Germany, etc.
- ELEVATION
The height of the obstacle. Minimum is 11mAGL. This may be a number (e.g. 100) or a string indicating the reference and the unit, e.g. 100mAGL or 330ftAGL or 2000mMSL. In the later case, a computation of the local elevation is done to obtain the actual height AGL, which only works for Point geometries.
- LIGHTED
The obstacle is lighted. Accepted values: Y, N.
The following field is optional:
- REMARKS
For additional comments. 1000 characters max.
Supported obstacle types#
Available type |
Meaning |
Supported geometries |
|---|---|---|
power support |
Power Support |
Point, LineString |
mast |
Mast |
Point |
building |
Building |
Point |
chimney |
Chimney |
Point |
tower |
Tower |
Point |
factory |
Factory |
Point |
antenna |
Antenna |
Point |
wind turbine |
Wind Turbine |
Point |
cable |
Cable |
Point, LineString |
spire |
Spire |
Point |
other |
Other |
Point |
crane |
Crane |
Point |
pole |
Pole |
Point |
tank |
Tank |
Point |
barrier |
Barrier |
Point |
mill |
Mill |
Point |
mountain |
Mountain |
Point |
natural |
Natural |
Point, LineString |
vegetation |
Vegetation |
Point, LineString |
line |
Line |
Point, LineString |
tree |
Tree |
Point |
church |
Church |
Point |
forest |
Forest |
Point, LineString |
anemometer |
Anemometer |
Point |
silo |
Silo |
Point |
hill |
Hill |
Point |
radar |
Radar |
Point |
terrain |
Terrain |
Point, LineString |
aerial railway |
Aerial Railway |
Point, LineString |
lift |
Lift |
Point, LineString |
water pipe |
Water Pipe |
Point, LineString |
Sign |
Sign |
Point |
aerial |
Aerial |
Point |
After creation, edition or import#
The obstacles are automatically added to the default data group when importing the data from
Shapefile or KMZ, while it’s added to the data group of your choice when creating/editing. If you need to change the
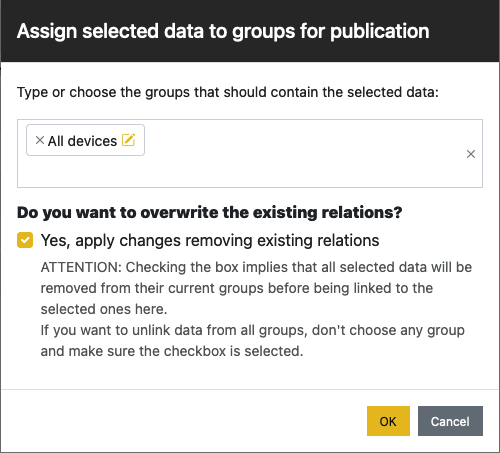
association, you may select the obstacles via their checkbox, and click on  below the table. You are then
presented with the following:
below the table. You are then
presented with the following:
Publish#
You need to publish a data group to make the obstacles visible in Air Navigation Pro.